AIRBNB HOTELS
Creative brief
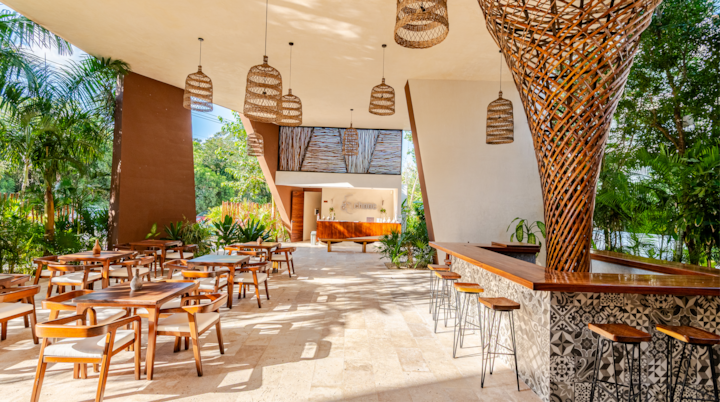
Photography of Hotels is premium and cinematic, evoking the feeling of being there and creating a visual language that is faithful to the essence of each property. From sweeping exteriors to the intimate details of each space, imagery will guide guests through an abundant editorial journey that balances enchantment with clarity.
PART 1
Overview
Deliverables
The final deliverables will vary based on the size and offerings available at the hotel. The image count below is per space offered.
Straight-on | Angle | Verticals | Total | |
|---|---|---|---|---|
Exterior & Entrance | 6-9 | 3-4 | 4-5 | 13-18 |
Rooms & Suites | 3-4 | 2-3 | 2-3 | 7-10 |
Bathrooms | 2-3 | 1-2 | 2-3 | 5-8 |
Common Space | 3-4 | 2-3 | 2-3 | 7-10 |
Total | 200 Min. | |||
How to prioritize
High priority spaces: exteriors, commons spaces, key amenities, accessible room / features, and 2-5 other rooms.Every hotel will be different, each with it’s own set of complexities. Hotels often have last minute bookings or maintenance. Knowing this, consider the most important spaces to photograph first, and then photograph in order. Below are some considerations when deciding to prioritize.
Time of Day
You can expect the photoshoot to take a minimum of 3-5 hours. Lighting and mood should feel premium and inviting, telegraphing what it actually feels like to be at the hotel. Optimize the timing for the best ambient light for each space, when the subject appears most visually captivating. When photographing the exterior and outdoor images, the light on the subject matter should be diffused rather than harsh. If you arrive at high noon, start with interiors first.


Natural light
Lighting and mood should feel premium and cinematic, and will telegraph what it feels like to be a guest at the hotel. Bracket images with high contrast lighting (such as with windows or direct light). This provides editors with a wider range of information to work with in difficult lighting situations.


Accessibility considerations
Our goal is to give all guests, including those with disabilities, clear, reliable visuals to assess accessibility. Include images that illustrate the full path of entrance to the common spaces, and rooms: from parking to entrance, elevator, hallway, room, bathroom, and common spaces. As well as images that highlight how rooms and spaces connect (eg. reception to the restaurant) and always feature doorways open. Additionally, prioritize capturing accessible rooms, when they are available. We recommend straight-on horizontal shots, using verticals when space is limited, and always illustrating floor space (keep camera height same as normal). Include multiple images to capture each of the following:


PART 2
Art Direction
Vantage points
Try to bring consistency by capturing most images at the same height, and avoid showcasing awkward angles, perspectives, and views into corners. Try to capture a range of wide, mid, and tight compositions of each room to allow editors to choose from a variety of images when making a final selection.


Details
Use a vertical frame when height or a single feature tells the story: tall windows, layered textures, or a cozy corner. Portrait orientation highlights scale, isolates key details, and gives a warm, editorial feel.


Exteriors
When possible, compose exteriors wide enough to allow for breathing room around the hotel in the landscape. Having ample negative space allows us to be flexible when cropping. This may mean getting creative to capture the entire exterior in the frame.

Human presence
Avoid capturing guests & staff when possible.When photographing spaces with people present, avoid capturing people in the images:
- if it is unavoidable, they should not be recognizable (never capture their faces straight-on and always put them at a distance, as seen in examples below). Get creative by focusing on mid or tight details in areas of the room without people, or return to the room when there are less people present.
- if they are recognizable, please secure a release for each recognizable person captured (download forms below).
- leave any relevant details about releases in the upload notes and be sure to upload the releases along with your final deliverables.


PART 3
Coverage
Our shotlist is dynamic and based on listing size. You will see minimum counts on the assignment page, but we encourage going above minimums. The following examples illustrate quality coverage that goes beyond the minimums:
Exterior & Entry
11-16 images
6-9 straight-on3-4 Angle2-3 Vertical
Exterior Entrance(s)Accessible path to entranceRamps / ElevatorsParking (include accessible parking spot(s))


Rooms & suites
7-10 Per room
3-4 straight-on2-3 Angle2-3 Vertical
Prioritize accessible roomsEntrance(s)Bed(s)Lounging furnitureKitchenette / desk/ closetWindow view / balcony / patio


Bathrooms
5-8 Per bathroom
2-3 Straight-on1-2 Angle2-3 Vertical
Bath / showerToiletFaucetToiletries / SoapsAccessible features


Indoor common spaces
8-12 Per space
3-4 Straight-on2-3 Angle2-3 Vertical1-2 Step-free room entrances
Lobby / Front deskDining room / Restaurants / BarsOffice / StudyGyms / Wellness spacesRecreation areas / Game spacesLaundry / IceStep-free entranceetc.


Outdoor common spaces
8-11 Per space
3-4 Straight-on2-3 Angle3-4 Vertical1-2 Step-free entrance
Pools / SpasSports courts / Play spacesBars / Dining areasBBQ / Fire pitOutdoor furnitureEtc.


Drone
Our team will contact you directly if we think the assignment requires drone photography.Certain assignments may require drone photography to achieve wider and higher vantage points—this will be clearly indicated in your assignment title. When planning your composition, carefully consider the key geographic features surrounding the property, or the best way to capture the exterior straight-on at a higher vantage point. Always leave negative space for the square crop.


PART 3
Tech Specs
Equipment
Required equipment
- Clean camera with full frame sensor
- Zoom lenses between 16-70mm
- Tripod (ideally with level)
- Drone
- Lens hood
- Bracket Merging Software (we recommend Adobe Lightroom)
- Grey Card
- Door stopper (for fire-doors etc.)
- Lens wider than 16mm
- Fisheye or prime lens
- Flash or strobes
- Photometrix Software (for file conversion / bracket merging)


File settings
Keep in mind that we only need the final merged images in your submission, not single bracketed assets. After merging, we ask you to upload RAW files converted to DNG. RAW file types contain the most information, which allows for more flexibility in retouching. DNGs also upload faster.
In-camera
- RAWs only
- Must be bracketed
- Adobe RGB Colorspace
For upload
- Merged brackets (guides in section below)
- DNGs (converted from .ARW, .NEF, .CR2 / 3, or .RAF)
Unacceptable formats
- JPGs
- TIFs
- PSDs
- PNGs
- DNGs converted from any of these formats.
Important settings
Images should be bracketed when an interior has a considerable difference between inside and outside exposures. Please merge your bracketed images before uploading. Keep in mind that we only need the final merged images in your submission, not single bracketed assets. We encourage using Adobe Photoshop Lightroom software for merging HDR images and converting files to DNG format to prevent compatibility issues in post-production. Adobe’s features help maintain colour profiles, metadata, and visual quality, providing more flexibility for achieving professional results, regardless of the camera model used. We recommend Camera RAW version 12 or above while exporting DNGs in Adobe Photoshop Lightroom Software. For file conversion and bracket merging, we kindly ask that you refrain from using Photometrix Software.
1 of 1 pages


File naming
Merge your brackets before uploading. Once merged, convert your RAW files to DNG, this format preserves the most data for retouching and uploads more efficiently.
- ListingID_Market_ShootDate(YYMMDD).DNG
- Example: 123456_Paris_231025.DNG
- Uploading jpegs, tiffs, psd, png, or DNGs converted from either of these formats.
- Filetypes should have the ‘adobe color’ profile attached to them.
- Using backslash ‘/’ in your file’s name

Examples


More resources
Explore our briefs for our other programs.


The content of this page is proprietary and confidential information of Airbnb and shall not be used, disclosed or reproduced, in whole or in part, for any purpose without the prior written consent of Airbnb.Questions?
photography@airbnb.com