Getting Navigate Set-Up
Before you can receive your first assignment, you’ll need to get your account set up. This page will take you through the set-up process.

Set-up overview
Before you can receive your first assignment we’ll need you to complete the following steps, which are explained in more detail in the following sections.
1
Create your password
2
Activate your account
3
Add your location
Create your Navigate Account
Navigate is Airbnb’s media management tool.
- Look out for an email inviting you to set up a new account with Navigate.
- It is recommended that you use your registered email ID when setting up your account for the first time.
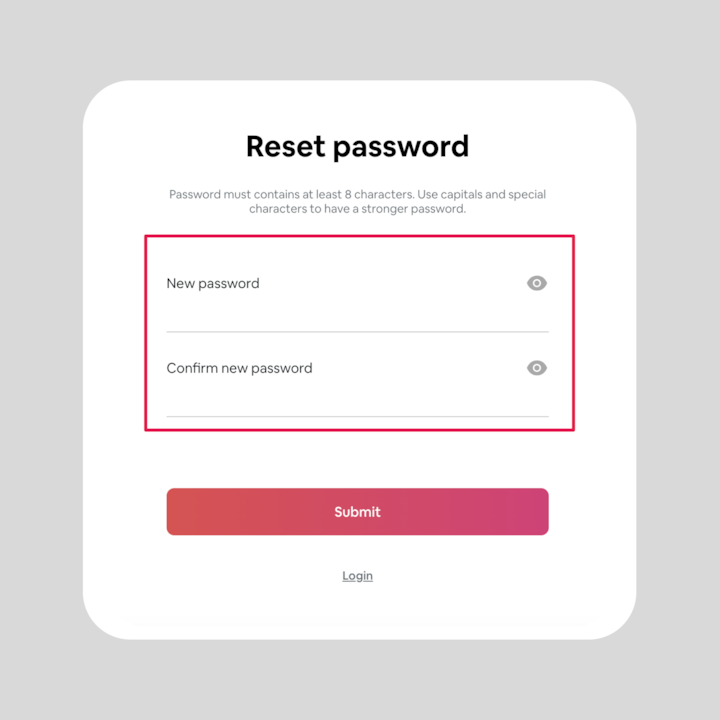
- After creating and confirming a new password, you will be able to access your new account on Navigate.

Navigate Logging In
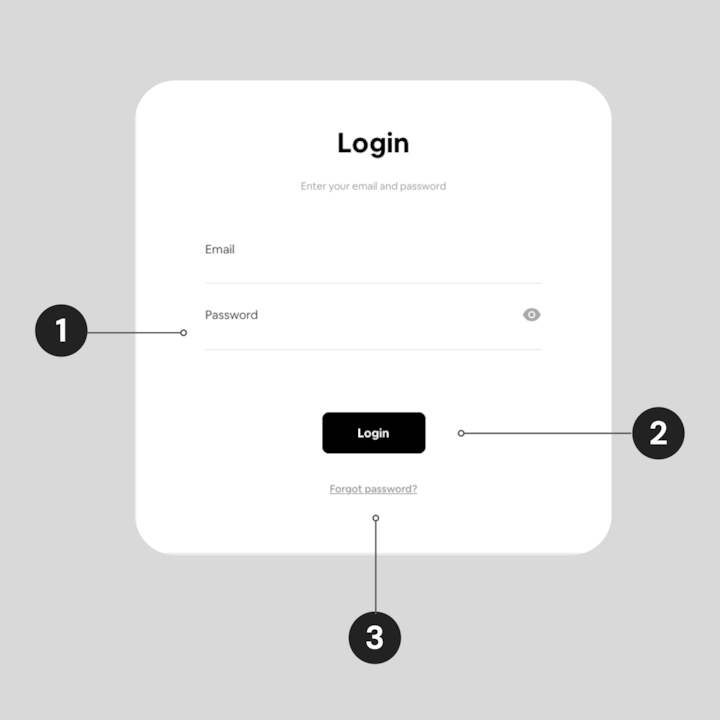
- Enter your email address and password.
- Click ‘Login’.
- If at any point you need to reset your password, this screen will also provide you an opportunity to do so.

Navigate Layout
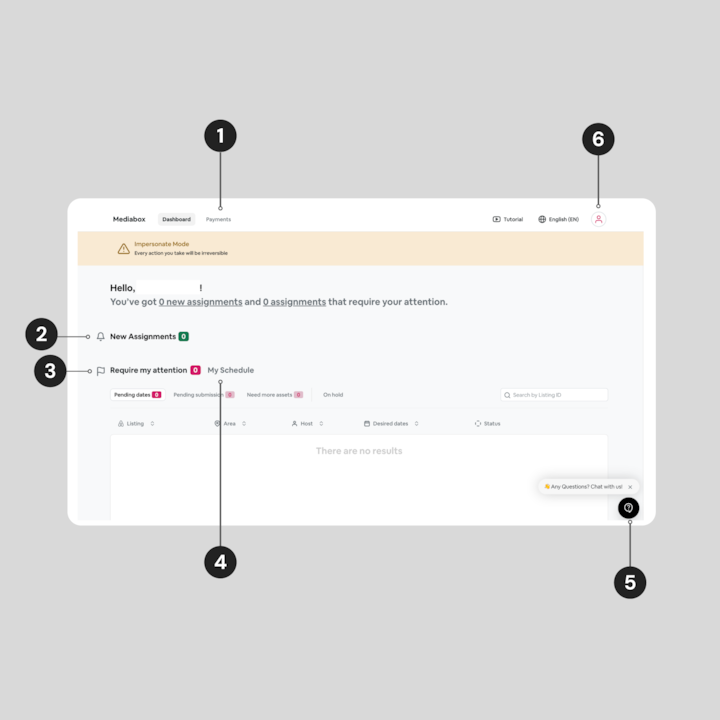
- View your payments with Airbnb.
- Inbox for any received assignments.
- Find notifications about your shoots and progress here.
- This view allows you to see assignments that have a scheduled date both in the past and future.
- Chat with our bot to get answers.
- Update your password, change your markets, and set yourself as inactive.

Account Settings
Once you’ve logged in, be sure to adjust your settings so you can begin receiving assignments based on your selected location.
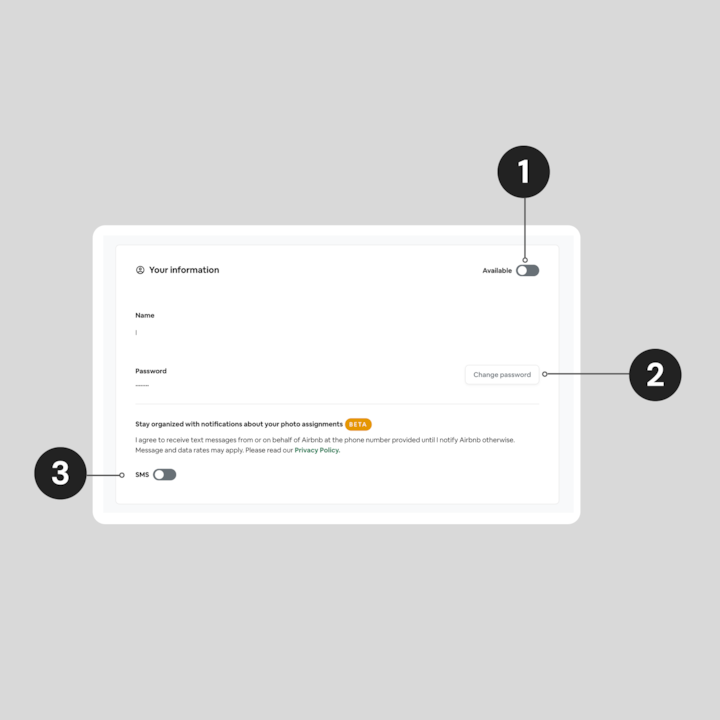
- Toggle on when you are accepting new assignments. Toggle off when you want to pause assignments.
- Change and update your password here (we suggest that you change/update your password every quarter).
- Toggle on for SMS updates to stay in the loop on what phase of the process the assignment is in.

Location Settings
Now that you’re accepting assignments, you can select your location.
- Select your region by clicking the drop-down.
- Once you’ve selected your region, select the country/territory you live in/near.
- Based on the country/territory you selected, choose all markets you feel comfortable receiving assignments in.
- Once you’ve finished selecting your location, click the 'update areas' button.

Assignments
How assignments are created, how to navigate the tools to accept or decline assignments, and more.

Quick navigation
If you know what you’re looking for, click the button below to quickly navigate to that section, or you can continue to browse at your own pace. Otherwise, we suggest starting at the Navigate set-up section.


