Uploading & Payment
This page will explain our expectations of deliverables, such as merging your bracketed DNGs, how to prep your files for upload, and how to use the uploading tool.
Merge brackets
Images should be bracketed when an interior has a considerable difference between inside and outside exposures. Please merge your bracketed images before uploading. Keep in mind that we only need the final merged images in your submission, not single bracketed assets. Our preferred pro photography toolset is the Adobe Suite. If you are using other post-production software, we recommend visiting the relevant help guides or manuals on how to bracket images, rename files, and convert to DNGs.

Adobe Lightroom
An archiving and editing tool used for batch photos and processing.


Prepping your files
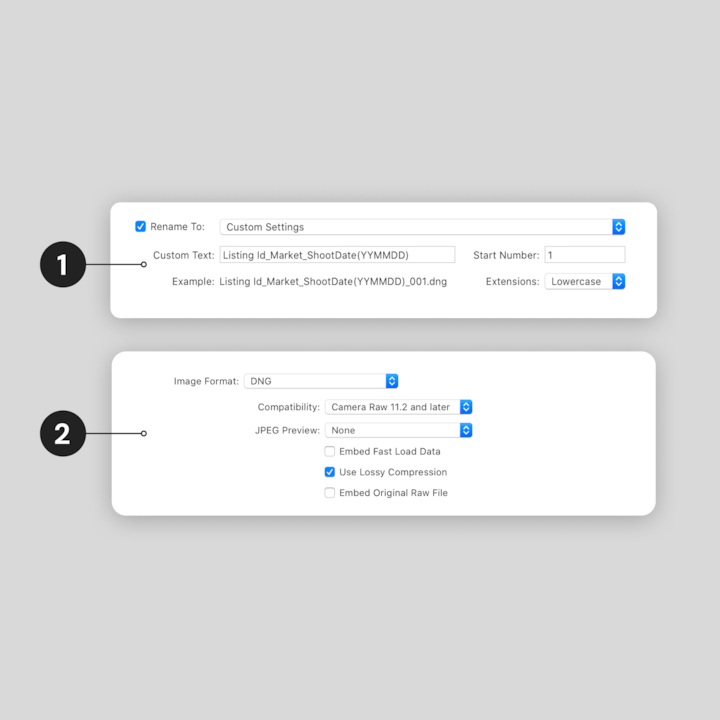
After merging, we ask you to upload RAW files converted to DNG. RAW file types contain the most information*, which allows for more flexibility in retouching. DNGs also upload faster.
- Export as DNGs using the following file naming:
- ListingID_Market_ShootDate(YYMMDD).DNG
- Example: 123456_Paris_231025.DNG
- Set your image format to DNG. If you find that your images are uploading too slowly, you can use lossy compression.
Navigating to the uploader
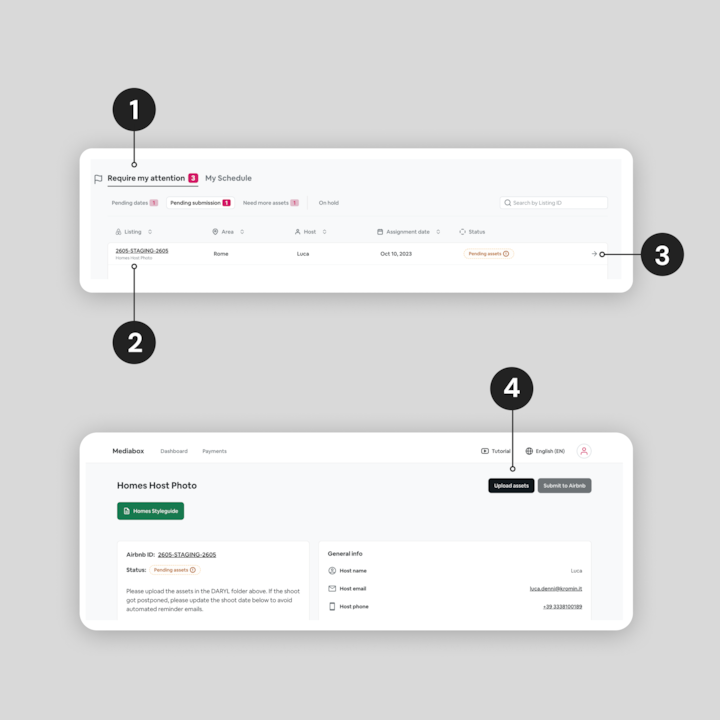
Once you’ve finished merging your images and are ready to upload, you’ll want to navigate to the assignment page in Mediabox.
- Return to the ‘Require my attention’ section of your Mediabox and select ‘Pending Submission’.
- When the scheduled date is in the past and assets need to be delivered, it will automatically move the relevant shoots to this section.
- Click the arrow next to the shoot you want to upload.
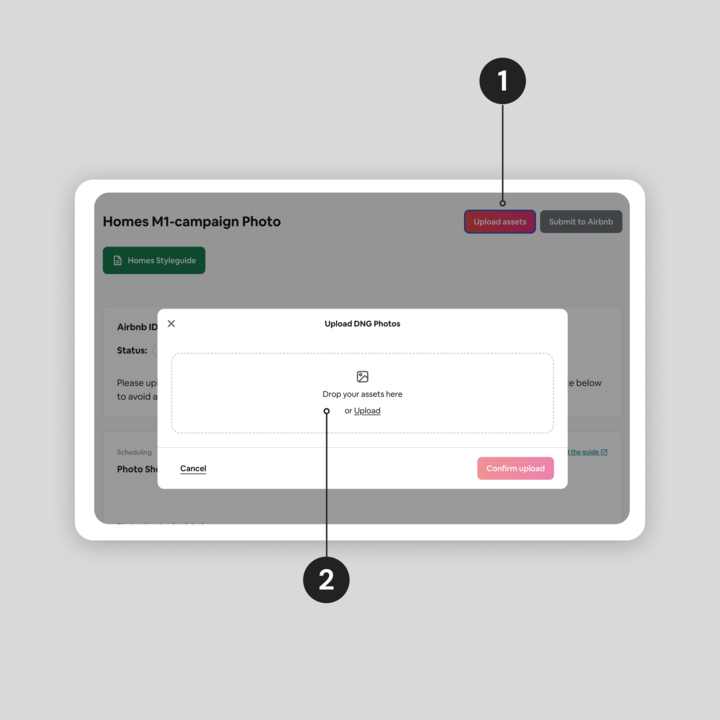
- From the assignment page, click on ‘Upload assets’. Keep in mind that this button is only clickable on/after the photoshoot date.
Adding your files
The upload process happens directly on Mediabox, which stores the files for post production. To upload your files:
- Click ‘Upload assets’ at the top of the assignment details.
- Drag and drop your assets into the box or click ‘Upload’ to select the files from your system.
Selecting the files
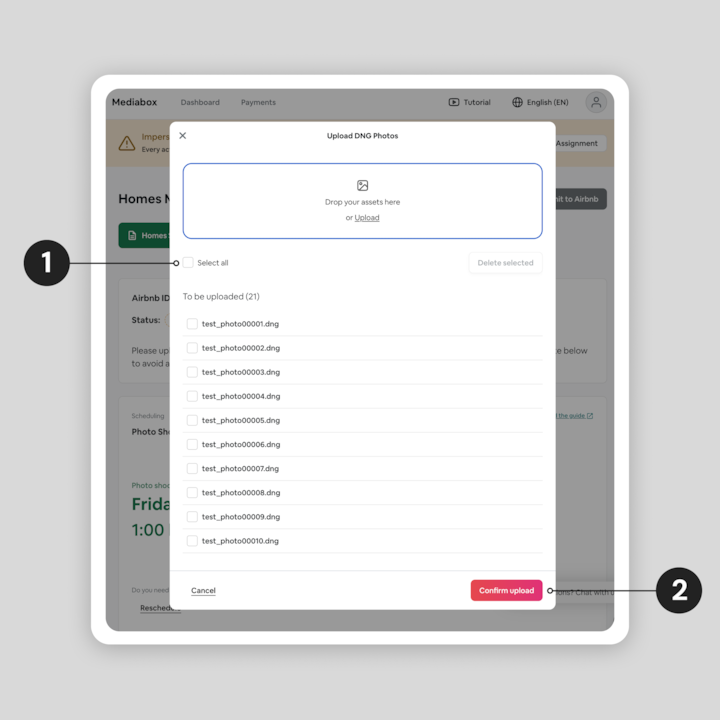
The files will show up below the uploader box. If at any point you need to add additional files, you can simply drag them into the uploader box at the top.
- You can click ‘Select all’ or manually select the files you want to upload by ticking the checkboxes.
- Once all relevant files are selected, click ‘Confirm upload’.
Uploading
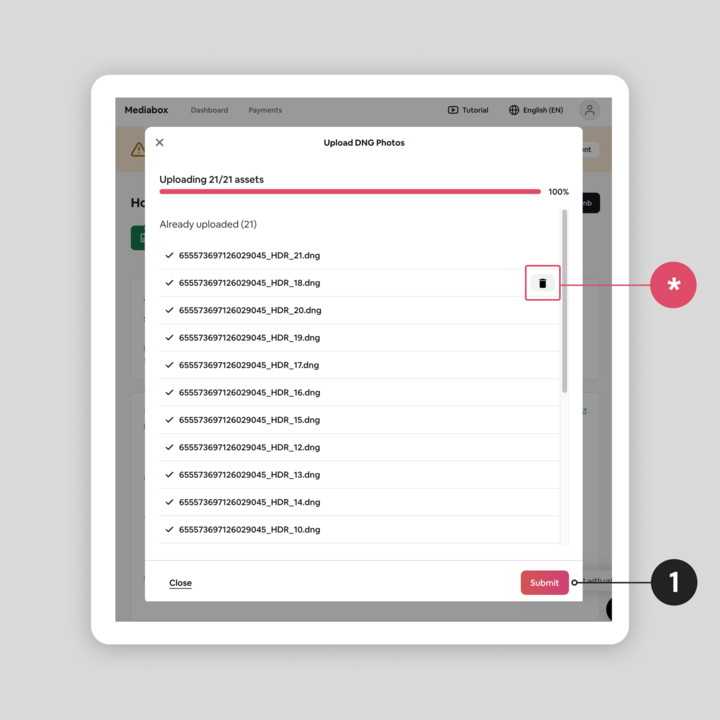
At the top of the uploader, you’ll see the uploading percentage completed. 100% will indicate all assets have been completed and are ready to be submitted.
- Click ‘Submit’.
Adding photoshoot notes
Before submitting your assignment, you can add relevant notes for our team. This may include notes from the Host on directions they provided you, obstacles your experienced at the listing, or other important information you feel would be useful in the post production process. To do this:
- Once you have uploaded your assets, click the button ‘Submit for review’ on Mediabox.
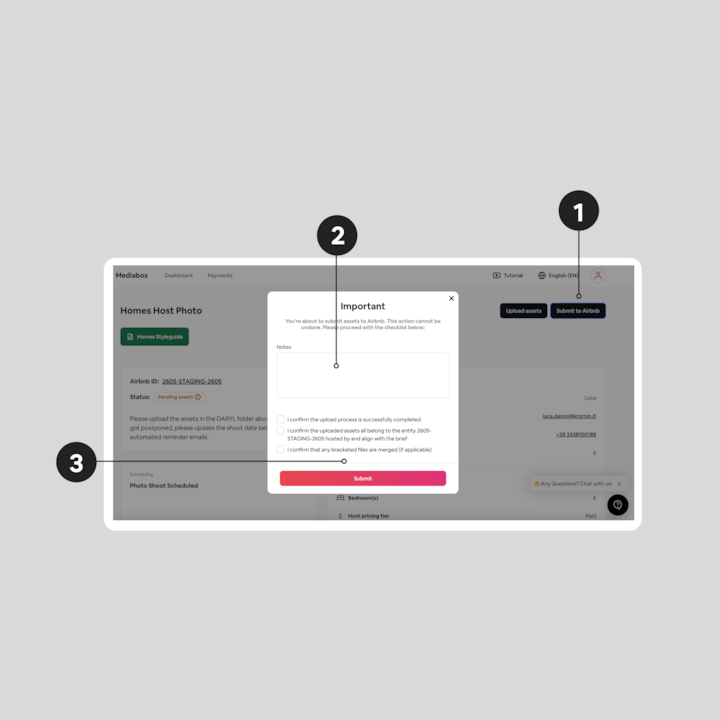
- Once the upload is complete, return to Mediabox and click ‘Submit to Airbnb’.
- On the pop-up, please provide the editor with your notes or specific requests from the Host.
- Review and click all three check boxes before pressing ‘Submit’.
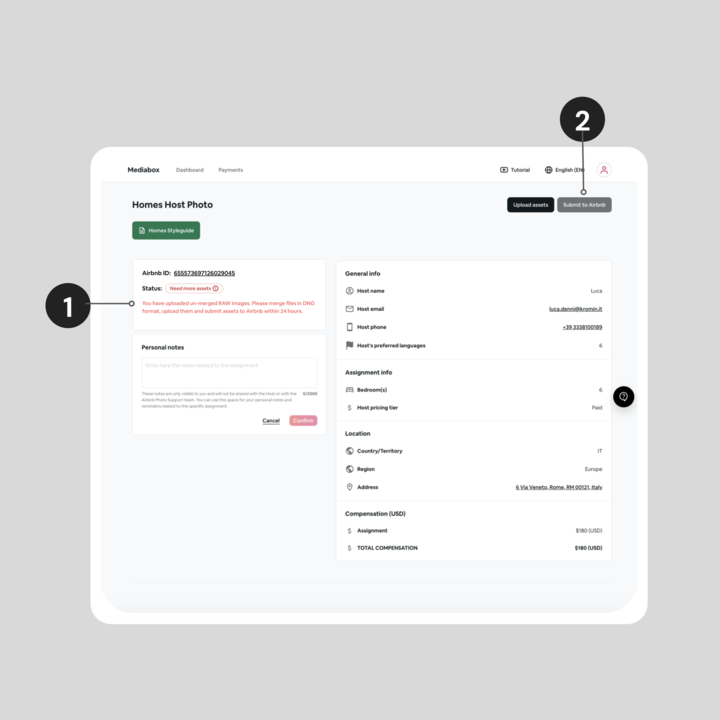
Need more assets
After the assets are submitted, our team will review them. If the assets submitted are rejected you will receive an email notification. Click the link in the email to be taken to the assignment page for more detail (as seen here).
- The assignment page will show the exact reason of rejection and invite you to upload the correct assets.
- Once the updated assets are uploaded to DARYL, click on the ‘Submit for Review’ button on the assignment page in Mediabox.
Payments
If you haven’t already, be sure to update your payout method by following our instructions.Once you've successfully submitted the images, we begin the payment process. Payments are made within 30 days of completion of the photoshoot.
Follow this payout method guidePayments
If you haven’t already, be sure to update your payout method by following our instructions.Once you've successfully submitted the images, we begin the payment process. Payments are made within 30 days of completion of the photoshoot.
Follow this payout method guideRoles & expectations
Learn about our expectations of the Photographers, Hosts, and Airbnb’s role in the program.
Quick navigation
If you know what you’re looking for, click the button below to quickly navigate to that section, or you can continue to browse at your own pace. Otherwise, we suggest starting at the Mediabox set-up section.


